LiteRaider AR Handguard Installation
1791 LITERAIDER™ AR-15 / M4 HANDGUARD
SETUP AND INSTALLATION
Note: Installation by a qualified AR-15/M4 Armorer is HIGHLY recommended.
Note: Estimated installation time. Approximately 20 minutes
Step 1 – Verify Contents
- 1 – Handguard
- 1 – Timed Barrel Nut
- 4 – Handguard Installation Screws (10-24×1/4 Hex Button Head Cap Screws)
- 1 – Blue Thread Locker (Single Use Tube)
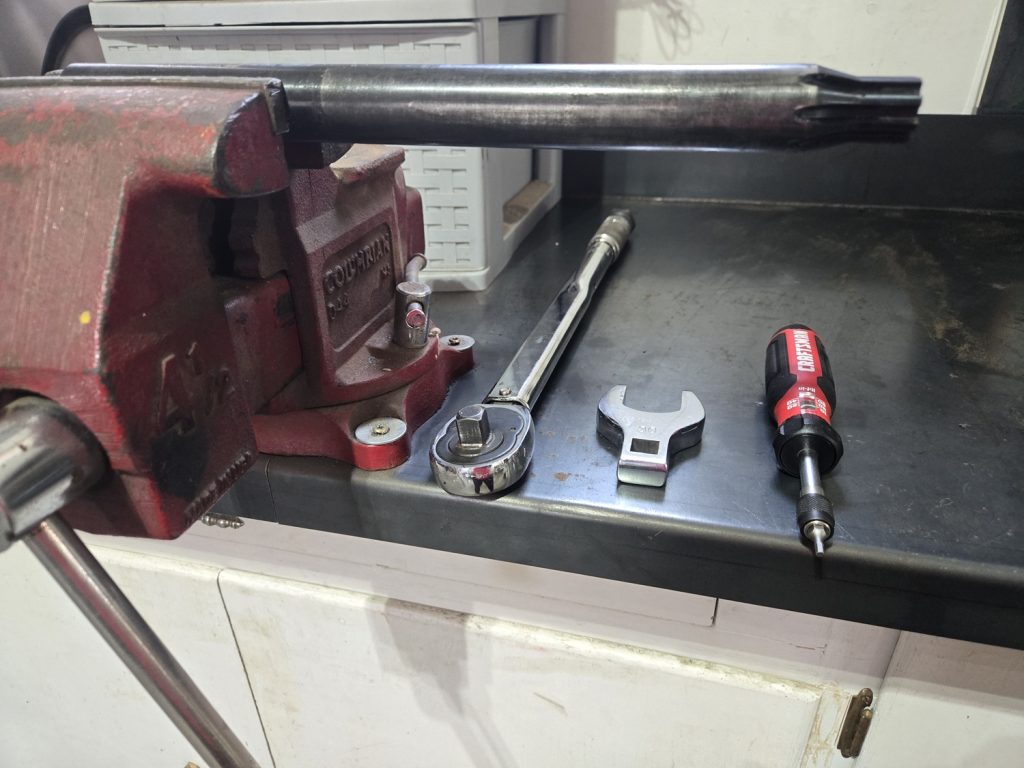
Step 2 – Gather Tools and Supplies
Recommended: GEISSELE® Reaction Rod (5.56/.223), or MAGPUL® BEV™ Block – AR15/M4
Advisory: The above mentioned AR-15/M4 Armorer’s Vise Fixture recommendations isolate torque energy to the barrel and barrel extension, minimizing strain on Upper Receiver, Lower Receiver and Handguard during elevated torque installation procedure.
1 – Anti-Seize Grease, Milspec (Ex: AeroShell 33MS or AeroShell 64)
1 – Safety Glasses that conform to current ANSI Safety Ratings for Impact
1 – Bench Vise, 4” Jaw
1 – AR-15/M4 Armorers Vise Fixturing
1 – Torque Wrench, 1/2” Drive (Calibrated in Foot Pound Increments)
1 – 30mm Crows Foot Wrench Head, 1/2” Drive (Match Torque Wrench)
1 – Torque Screwdriver Set (Calibrated in Inch Pound Increments)
1 – Allen Drive Head, 1/8” Imperial Std (Drive Head Match Torque Screwdriver)
Step 3 – Pre-Installation Checks
Verify weapon is unloaded, if making modifications to an existing firearm
Verify fighting accessories have been removed from firearm (Optics, Lights, Lasers)
Verify working area is free of ammunition, loaded magazines or other hazards
Verify that your barrel is equipped with a Low-Profile Gas Block. If user intends to free-float handguard over the Gas Block
Verify Handguard clearance over Gas Block
Step 4 – Installation Procedure
- Install AR-15/M4 Armorers Vise Fixturing on 4” Bench Vise
- If Upper Receiver is Barreled / Assembled, proceed to Step 2
- If Upper Receiver is Un-Barreled / Un-Assembled, proceed to Step 5
Steps for preparing an Assembled AR-15/M4 for Handguard Installation
- Mount Upper Receiver onto AR-15/M4 Armorers Vise Fixture according to manufacturer’s specification of Vise Fixture
- Remove the following items, in order, according to original manufacturer’s spec.a
- Remove original Handguard
- Remove original Flash Hider
- Remove original Gas Block
- Remove original Barrel Nut
- Dismount Barrel from Upper Receiver.
- Inspect Upper Receiver and Barrel for undue wear and tear. Ensure parts are serviceable. Substitute new parts as needed.
Steps for preparing an Un-Assembled AR-15/M4 for Handguard Installation
- Mount Barrel to Upper Receiver
- Align Indexing Pin of Barrel, with Indexing Notch of Upper Receiver
- Once aligned, press Barrel firmly into Upper Receiver
- Mount Upper Receiver onto AR-15/M4 Armorers Vise Fixture according to manufacturer’s specification of Vise Fixture
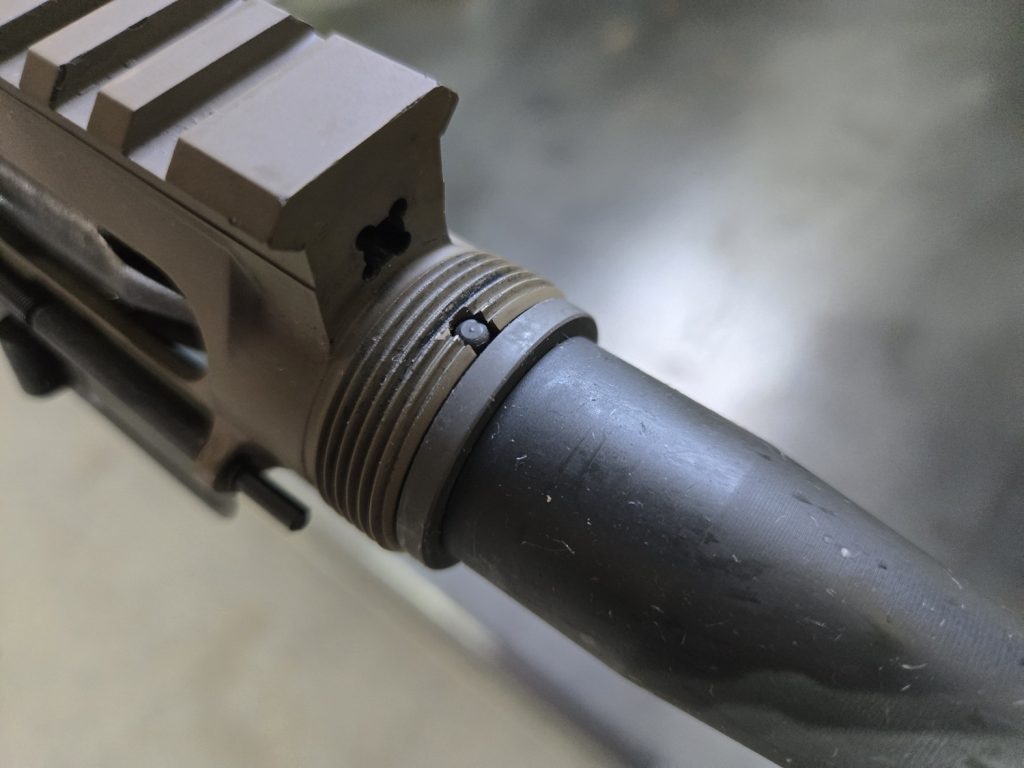
- Prep AR-15/M4 Barrel Nut Threads
- Evenly apply Anti-Seize Grease
(Such As: AeroShell 33MS or AeroShell 64) - Pre-Install 1791 LiteRaider ™ Timed
- Barrel Nut, Hand-Tight Only
Back 1791 LiteRaider ™ Timed Barrel Nut off 3 to 4 full turns - Re-Install 1791 LiteRaider ™ Timed Barrel Nut, Hand-Tight Only
- This evenly spreads the Milspec Anti-Seize Grease on all thread surfaces
- Evenly apply Anti-Seize Grease
- Pre-Installation of 1791 LiteRaider ™ Timed Barrel Nut
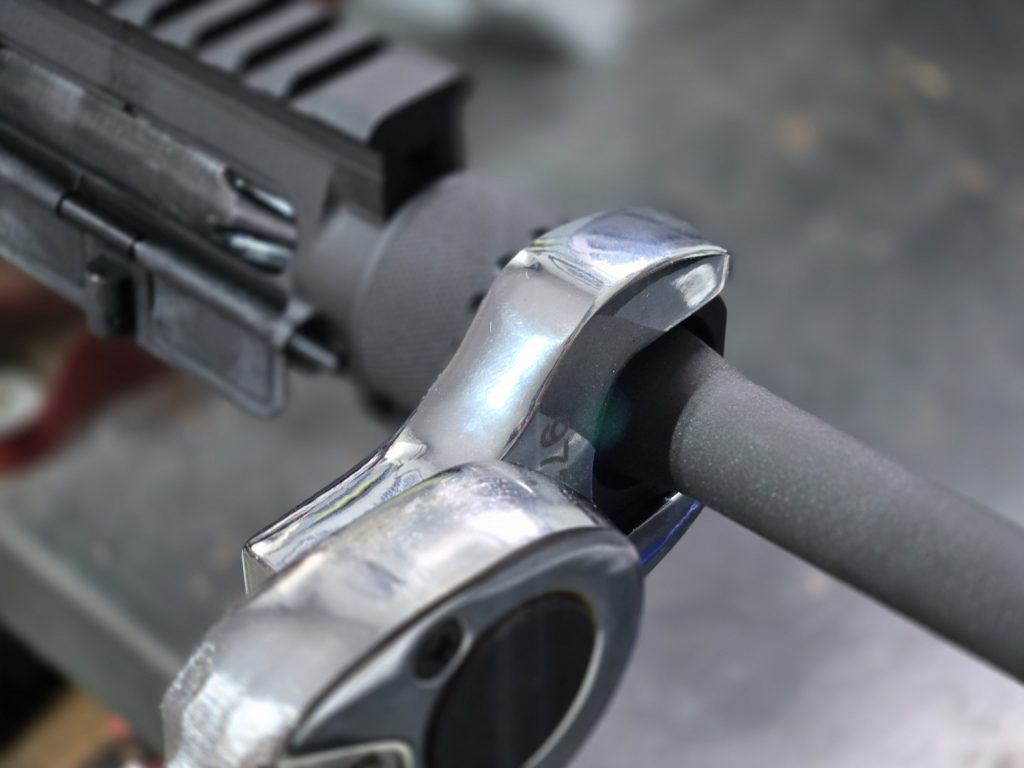
- Set Torque Wrench to 30 Foot Pounds
- Install 30mm Crows Foot Head Wrench on Torque Wrench
- Align wrench flats of 30mm Crows Foot Head Wrench with wrench flats of 1791 LiteRaider ™ Timed Barrel Nut
- Mount 30mm Crows Foot Head Wrench onto wrench flats of 1791 LiteRaider ™ Timed Barrel Nut
- Carefully, and firmly turn Barrel Nut with Torque Wrench until Torque Wrench indicates the desired Foot Pounds have been reached.
- Loosen barrel nut
- Repeat Steps 8.3 —> 8.6 two additional times. (Except on the final iteration, do not loosen Barrel Nut. Leave it torqued at 30 Foot Pounds.)
- This process prepares the AR-15/M4 Upper Receiver Barrel Nut Threads, and the 1791 LiteRaider ™ Timed Barrel Nut Threads for a perfect mate.
Note: The Handguard should fit fairly tight. This is classified as a “Slip-Fit” and ensures a reliable and repeatable mounting interface for precision aiming solutions mated to the Handguard.
- 1791 LiteRaider ™ AR-15/M4 Handguard Pre-Installation – Phase 1
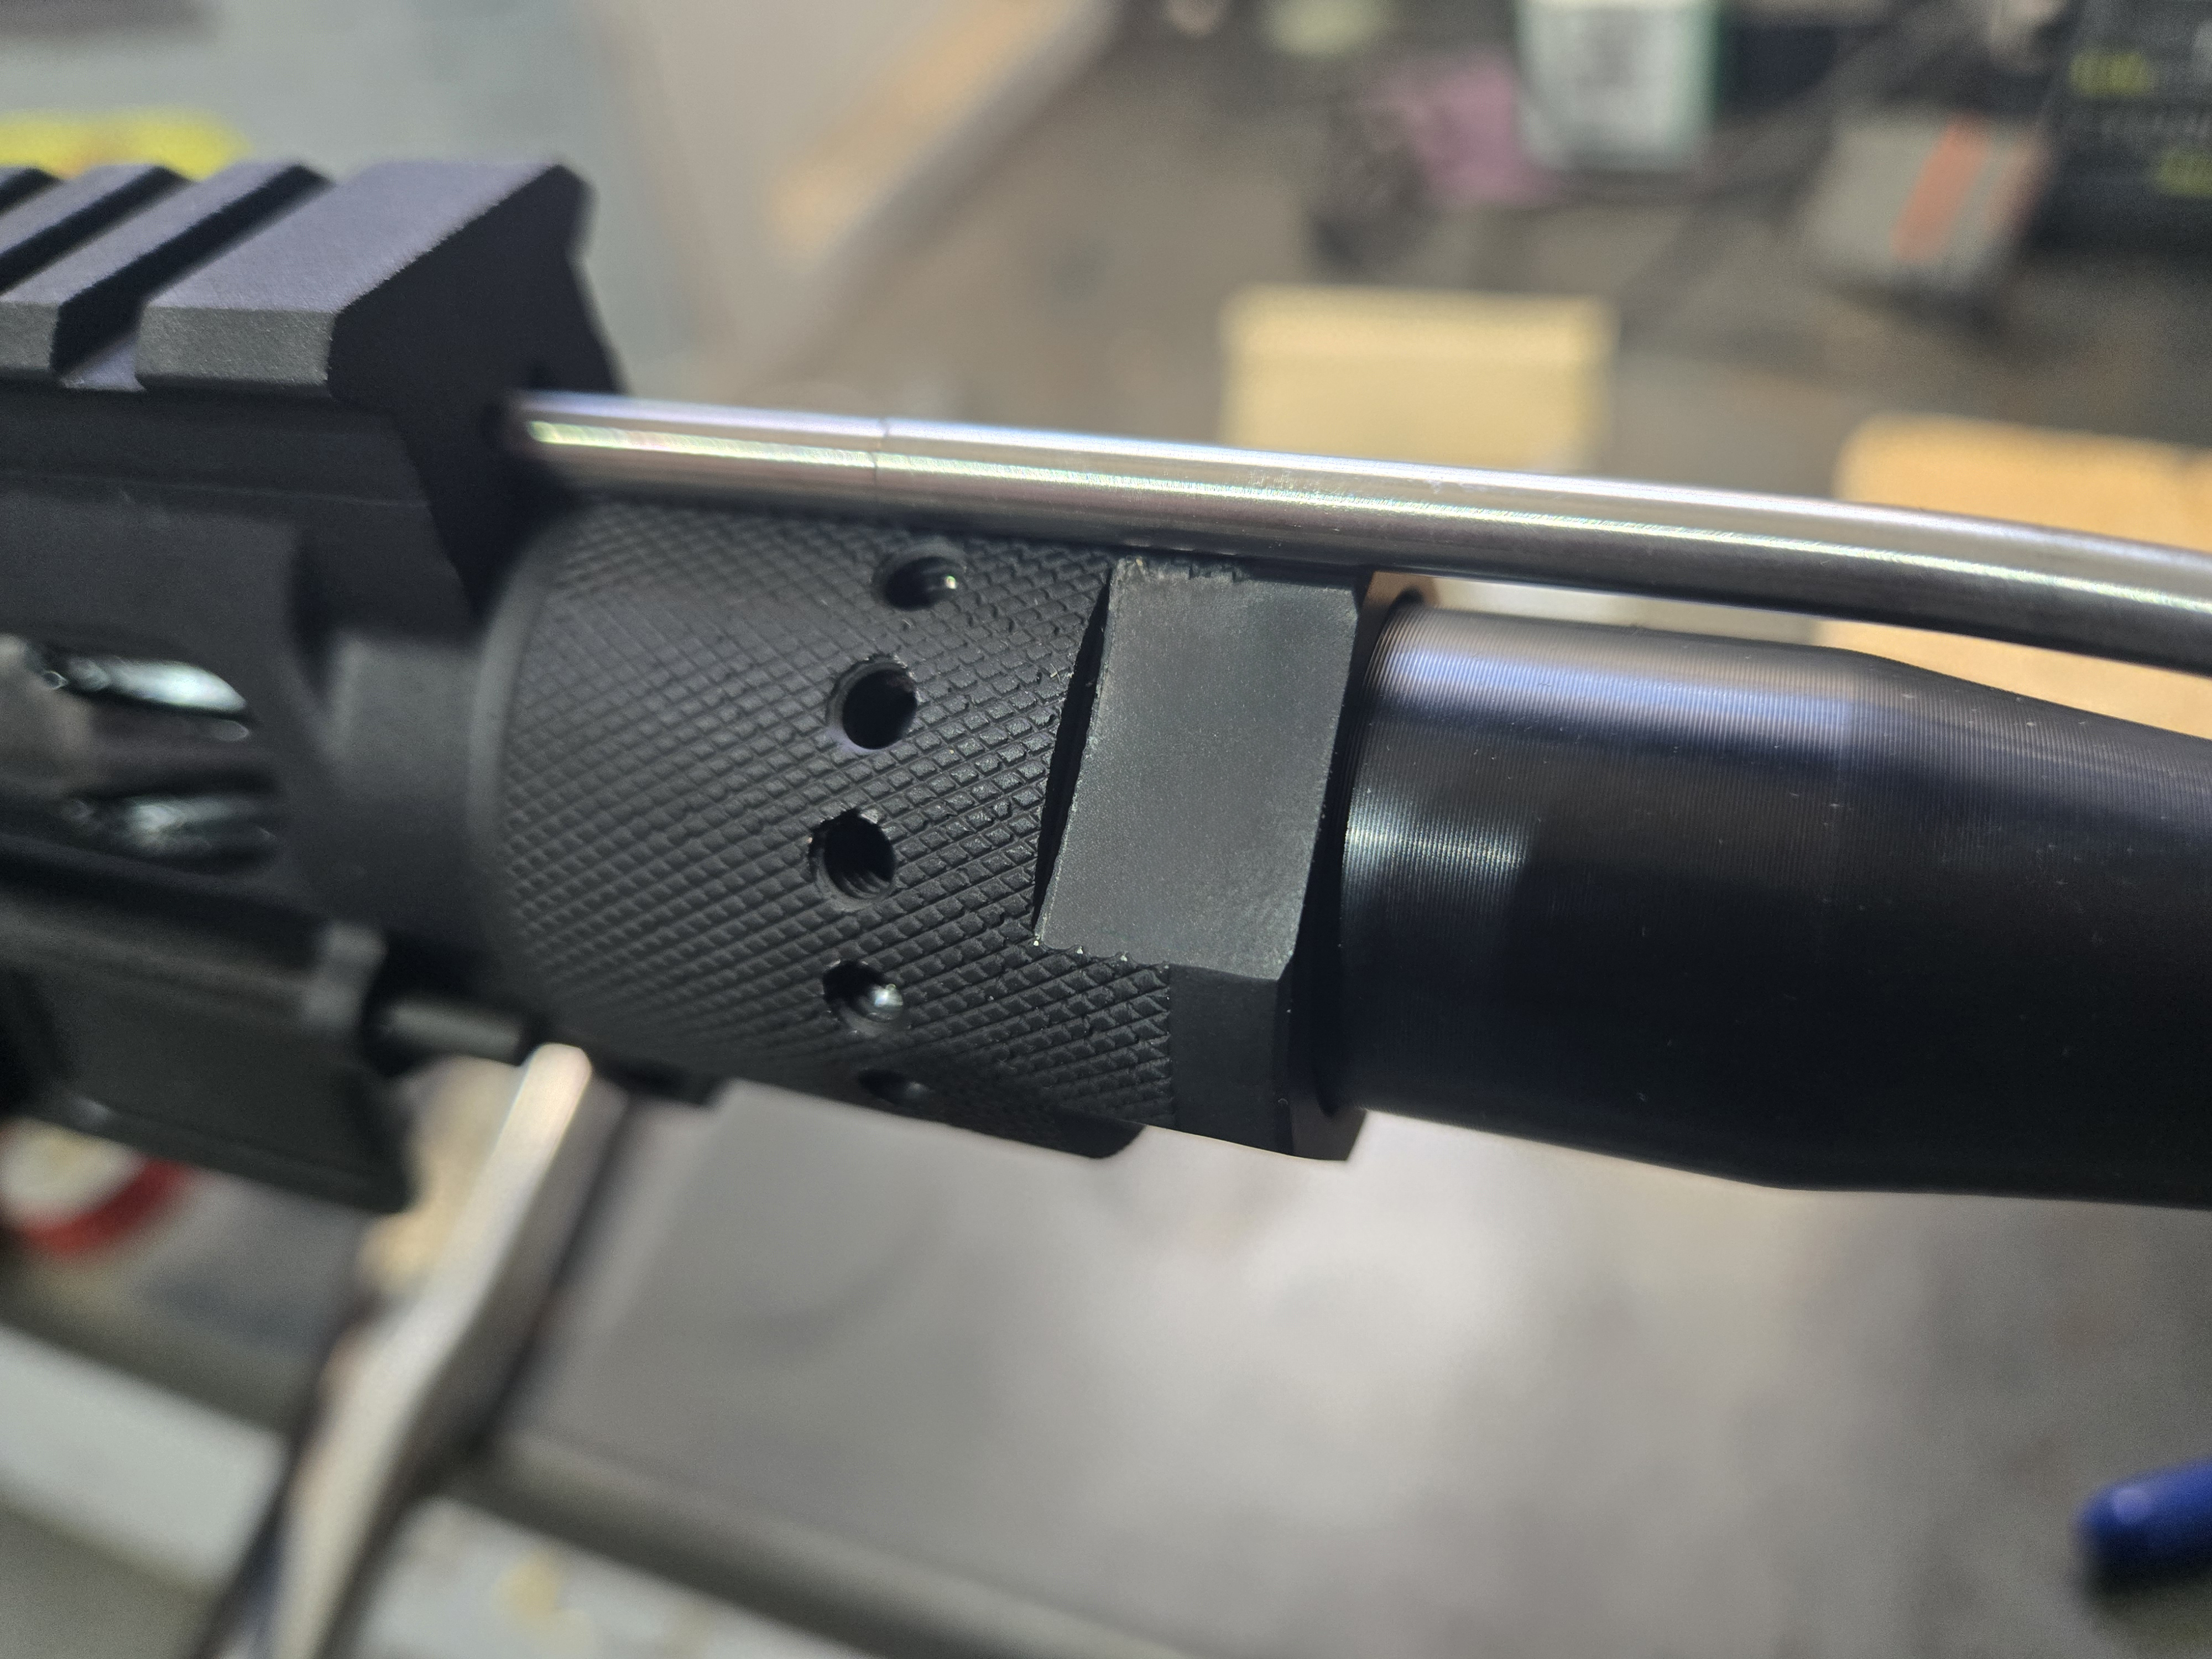
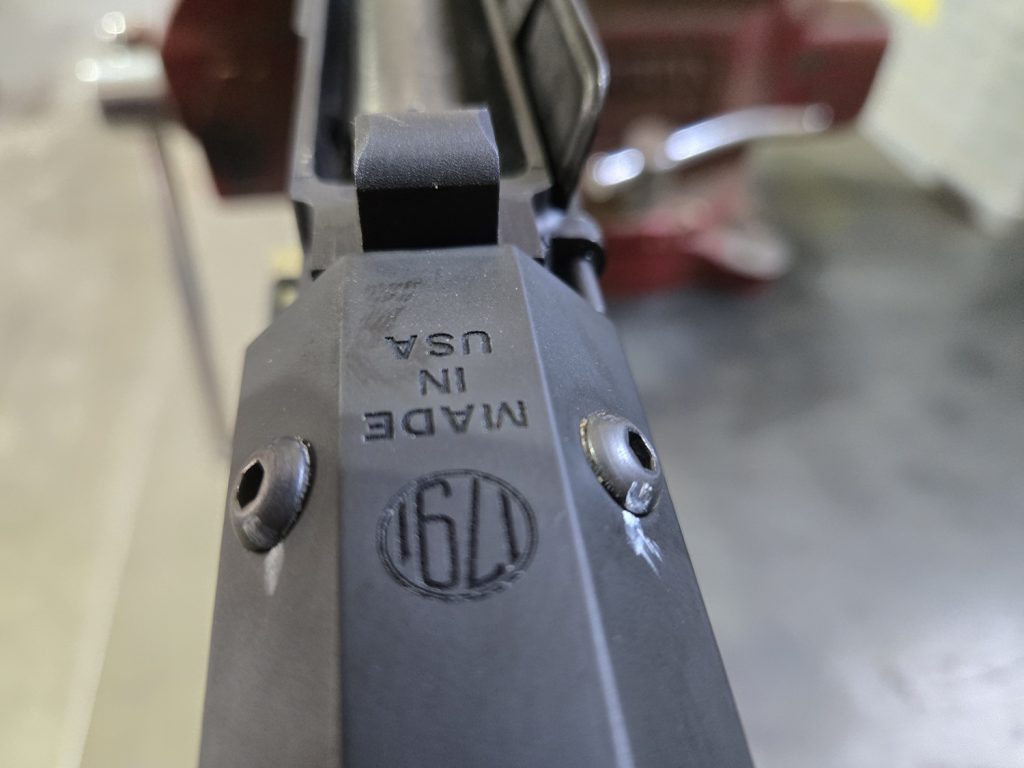
- With 1791 LiteRaider ™ Timed Barrel nut Pre-Installed, following the process outlined in Step 7 & 8, now take the 1791 LiteRaider ™ AR-15/M4 Handguard and install it over the barrel, with the “Made in USA” side of the Handguard on the Receiver-End, and “Made in USA” facing down.
- Carefully, and firmly press the 1791 LiteRaider ™ AR-15/M4 Handguard onto the Barrel nut.
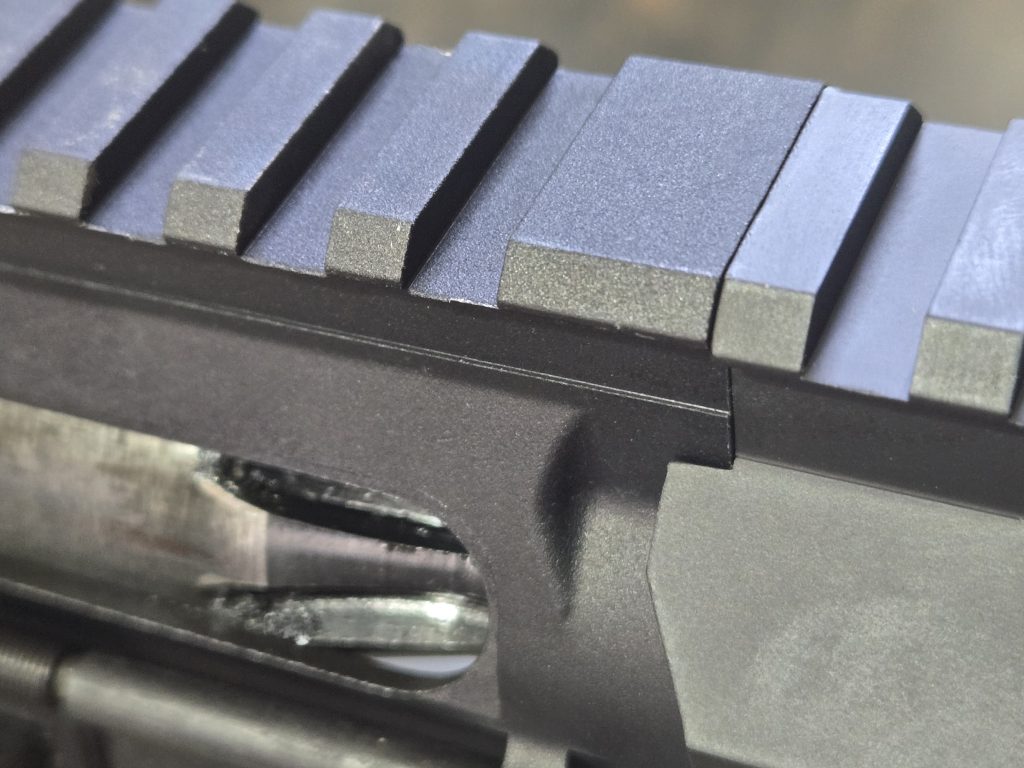
- Carefully press and twist the Handguard into place, so that the 1913 Picatinny Top Rail of the Upper Receiver matches the 1913 Picatinny Top Rail of the Handguard, ensuring alignment of the anti-rotational tabs around the Upper Receiver. (May need to tap into place towards the end)
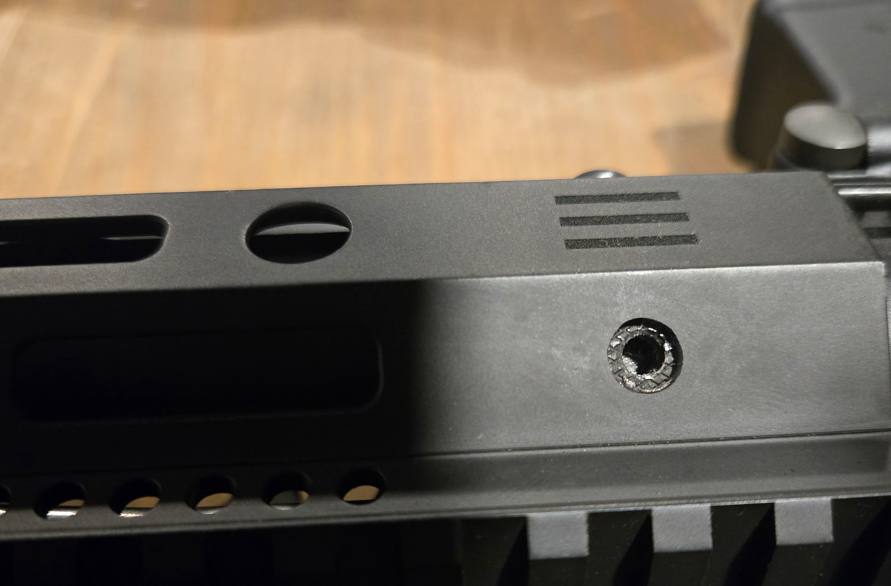
- Check Hole Alignment between 1791 LiteRaider ™ AR-15/M4 Handguard, and 1791 LiteRaider ™ Timed Barrel Nut on the (4) Handguard Installation “Lockdown” Screws
- If Holes are aligned without interference with Handguard material (Handguard screws can be screwed in), Skip to Step 10.
- If Holes are not aligned, and Handguard material is obstructing Handguard mounting screws from installation, Proceed to Step 9.5
- Dismount Handguard from Barrel Nut / Upper Receiver
- Add (5) Foot Pounds to the Torque Wrench setting, and lightly increase torque until the new torque value is indicated on Torque Wrench.
- Go back to Step 9 and follow the procedure to mount Handguard and check hole alignment.
- If Holes are aligned without interference with Handguard material (Handguard screws can be screwed in), Skip to Step 10.
- If Holes are not aligned, and Handguard material is obstructing Handguard mounting screws from installation, go back to Step 9.5
- Remove the Handguard and reinstall the following items, in order, according to the original manufacturer’s spec.
- Reinstall Gas Block, according to original manufacturer’s spec. Ensure proper Gas Block Alignment for proper firearm cycling
- Reinstall Muzzle Device, according to original manufacturer’s spec.
Note: The Handguard should fit fairly tight. This is classified as a “Slip-Fit” and ensures a reliable and repeatable mounting interface for precision aiming solutions mated to the Handguard.
- 1791 LiteRaider ™ AR-15/M4 Handguard Final Installation – Phase 2
- With 1791 LiteRaider ™ Timed Barrel nut fully installed, following the process outlined in Step 7 & 8, now take the 1791 LiteRaider ™ AR-15/M4 Handguard and install it over the barrel, with the “Made in USA” side of the Handguard on the Receiver-End, and “Made in USA” facing down.
- Carefully and firmly press the 1791 LiteRaider ™ AR-15/M4 Handguard onto the Barrel nut
- Carefully, press and twist the Handguard into place, so that the 1913 Picatinny Top Rail of the Upper Receiver matches the 1913 Picatinny Top Rail of the Handguard, ensuring alignment of the anti-rotational tabs around the Upper Receiver. (May need to tap into place towards the end)
- Check Hole Alignment between 1791 LiteRaider ™ AR-15/M4 Handguard, and 1791 LiteRaider ™ Timed Barrel Nut
- Evenly apply supplied Thread Locker to each of the Handguard Installation “Lockdown” 10-24×1/4 Hex Button Head Cap Screws
- Pre-Thread each screw into each hole until it stops. (Do Not Tighten).
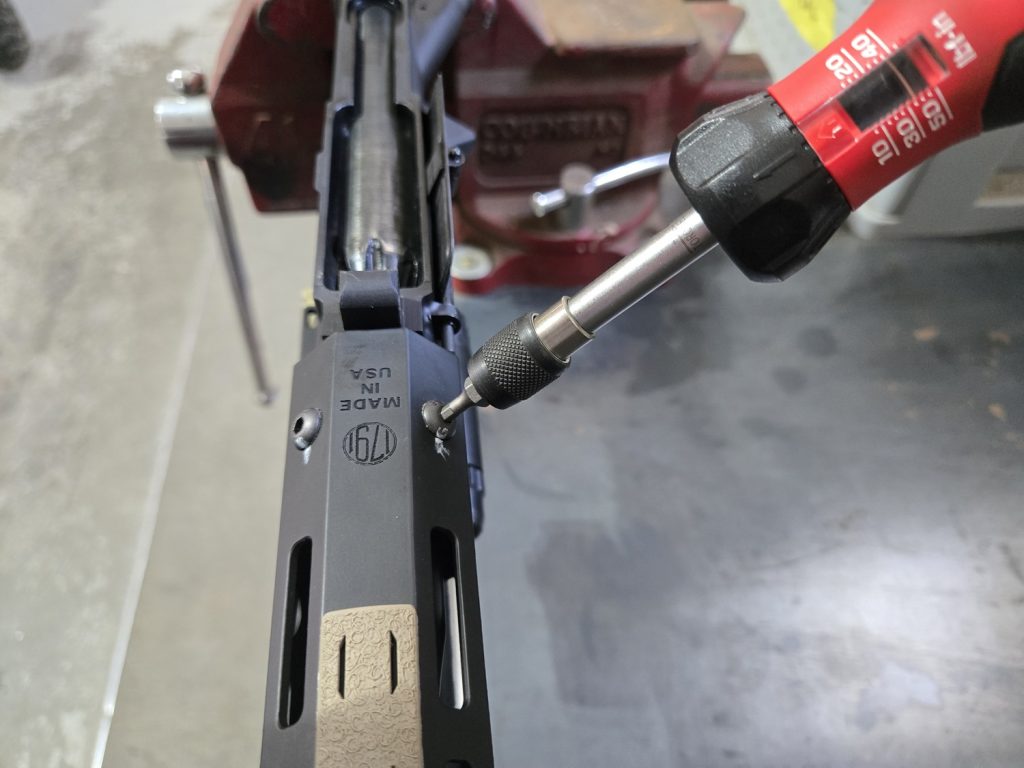
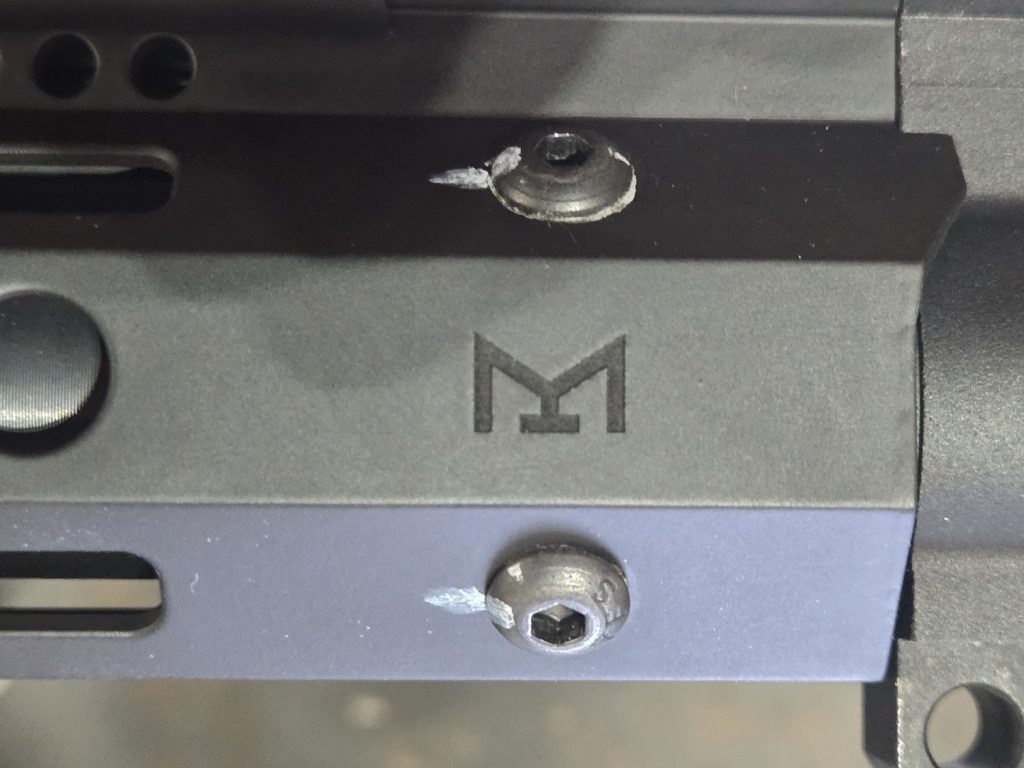
- Using a Torque Screwdriver and 1/8” Imperial Std Allen Head, torque each screw down to 20 Inch Pounds, in an “X” pattern; torquing the screw opposite of the one that was just finished, until all (4) Lockdown screws are installed, and torqued to 20 Inch Pounds.
- Optional: It is beneficial to apply a “witness mark” on the Handguard Mounting Screws with paint marker to be able to monitor if they begin to back out.
- Verify Handguard is mounted with proper alignment of the 1913 Picatinny Top Rail of the Upper Receiver and the 1913 Picatinny Top Rail of the Handguard.
- If alignment is not achieved, repeat Step 11 until desired alignment is achieved.
- Congratulations, your 1791 LiteRaider™ AR-15/M4 Handguard is properly mounted
- Re-attach necessary fighting accessories (Optics, Lights, Lasers)
- FIGHT!
Safety and Notices
Failure to wear proper Personal Protective Equipment may result in serious injury
1791 Outdoor Lifestyle Group, LLC, 1791 Industries and its subsidiaries are not responsible for damage or injury, due to negligence on behalf of operator
Installation by a qualified AR-15/M4 Armorer is HIGHLY recommended
Failure to follow proper installation procedure outlined in this document shall void 1791 Industries Manufacturer’s Warranty